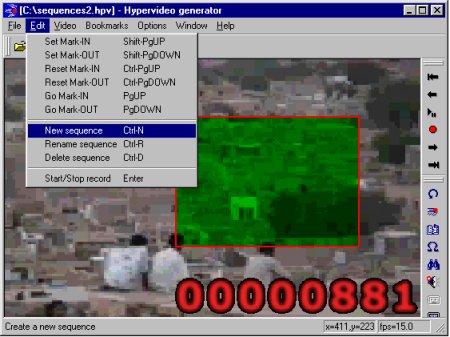
An overview of visible sequence operators in the menus
Floating toolbars let you apply a function without having to drop-down a given menu. And we believe that most icon design is intuitive. Moreover, any toolbar has a major color, for example the sequence toolbar is yellow. This in our opinion can help when it comes the time that there are so many things on screen that you have to think before you do anything.
The GUI is almost completely customizable. All toolbars can be removed from screen. And any of them can be recalled with the Window menu. But more importantly, any toolbar can be docked in any of the four borders of the window. Sometimes, the layout is a bit strange, or even lousy, but this is just Windows95 functionality.
For a full overview of the toolbar functionalities, see reference.
To be able to work with a set of sequences, one of the elementary features of a project manager, means to be able to call operators to navigate through sequences, and to apply a specific operation on a given sequence.
All the hotspots you record are recorded into a container called the current sequence. To create a new sequence, go to the Edit menu, and select NEW SEQUENCE, or press CTRL-N or good advice press the NEW SEQUENCE icon in the sequence toolbar. A new sequence doesn't have begin and end marks yet.
It's advisable to create a new sequence for any new actor, but also for a given actor it's also a good idea to create a new sequence if this actor appears for 3 seconds in the beginning of the movie, then create another sequence if he appears 4 seconds for example at the end of the movie. To make it clear, in between, the actor doesn't appear, thus there shouldn't be any hotspot related to him (directly, or indirectly, ie interpolated). If you do your work with a unique sequence, this just won't do !!
You can go to the next sequence, if any, using either the NEXT SEQUENCE icon in the sequence toolbar, or when you have the focus on the sequence combo-box, use the down arrow. By analogy, you can go to the previous sequence, if any.
At the moment, you can't in the program itself copy and paste the content of a sequence towards another. You can do it manually outside HyperGen editing the HPV file using your favourite editor. It's up to you. But quite honestly, where is the point of duplicating the content of a sequence ?
You can delete a sequence. A dialog box will ask for confirmation. Go to the Edit menu, and select DELETE SEQUENCE, or press CTRL-D, or press the DELETE SEQUENCE icon in the sequence toolbar. When you delete the unique sequence in your project, the program tells it to you, and automatically creates a new empty sequence for convenience.
Unfortunately, at the moment, there is no Undo function. Technically, a non-OLE Undo function is quite hard to implement, not because undeleting a sequence is tough, but because an Undo feature implies to maintain a lot of other data too.
You can change some of the properties of the current sequence : its name, and whether at store-time the interpolated in-between frames will be stored or not. Go to the Edit menu, then select RENAME SEQUENCE, or press CTRL-R, or press the PROPERTIES icon in the sequence toolbar. The program doesn't let you rename a sequence so that it has the same name than an existing sequence. For more details, see tutorial.
For a complete overview of other sequence properties, such like hypermedia links, see advanced topics.
An overview of visible sequence operators in the menus
When you change of current sequence, remember that the program automatically computes new begin and end marks to be used with the PAGE-UP/PAGE-DOWN or other combinations, in accordance with the current squence. In fact, the marks are global settings and each time you switch to another sequence, the global mark settings refer to the begin and end marks for this sequence. Resulting in marks that can be used without having to be indexed, or something like that.
We have also to point out that the begin and end marks don't necessarily match the actual begin and end of a sequence. It matches just after you select a sequence, but when you start setting a new begin mark, it doesn't affect the content of the sequence in memory, but :
By analogy, you can cut a portion of the sequence using implicitly the end mark.
The upper is the video slider, that is the general slider which lets you access directly any frame in the video, whether the video lasts 3 seconds or 2 hours. It has a background functionality, the selection bar, which shows the part of the video in which the current sequence has an hotspot. We believe it was important to do that, since a video comes with so many cuts, actors, and informations that it is hard, not to say impossible, to remember all of them and when they appear in the video.
The other slider is the sequence slider. It shows the position of the frame in the current sequence, that is the sequence shown which name appears in the combo-box. The slider is in fact a zoomed, say functional, version of the selection bar behind the main slider. As well as the main slider, it allows you to perform seeks. But as it is only a part of the video, the seek can be fine, not coarse anymore. The most left position of the slider corresponds to the MARK-IN of the current sequence. The most right position corresponds to the MARK-OUT. When the video is playing, the cursor is automatically repositionned depending on the current frame.
Any of the two sliders can be used :
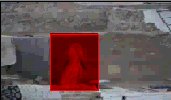
One of the main blasting features is the real-time filters. Not only hotspots are overlayed on the video, but a filter is applied automatically inside.
Choose a filter using the OPTIONS MENU. Then all hotspots and all motions will be displayed using this filter. This feature is quite new, since programs who overlay something overlay low-charging stuff, such like text and contours. In this program, the filter feature demonstrates versatile effects and other visual transforms applied in real-time.
The filter feature is actually a plug-in. When the program starts, it searches for the FILTERS.DLL file, and enumerates all filters inside. A menu is then constructed and filters are added with their descriptions. The Red filter is the default filter. The None filter is the null filter in case your eyes can't stand it. If the program can't find the DLL file, in the same directory as the executable program, then the menu is not constructed, and you will work without filters. But the program doesn't hang just for that. The DLL is a true plug-in since we may add any new filter in the future and if we send it to you, you will just have to replace your existing DLL file. The filters don't come with a property dialog. But it may in the future. In fact, the filters can be regarded as something more general and a lot of video-content algorithms can be performed using filters, including shot detection engine, motion tracking, automatic object extraction and so on.
Here is the list of standard filters we have implemented in this release :
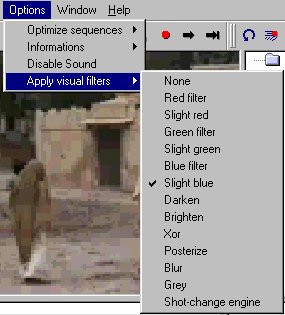
Standard list of real-time visual filters inside the DLL file
Note that the shot-change engine is not a visual filter, it's an image processing (or more exactly video processing) filter, which communicates with the application with its own language. But the shot engine belongs to list of the filters in the DLL anyway.
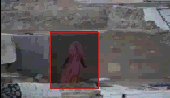
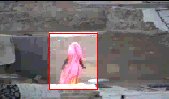
And here is what the filters look like when they are applied :
 None |
|
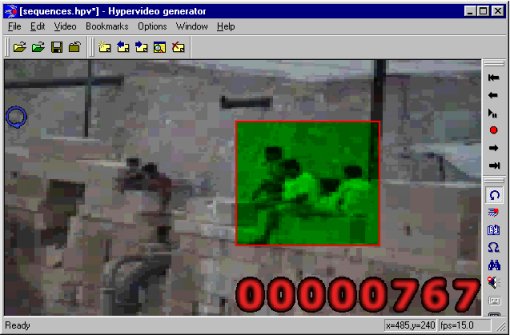
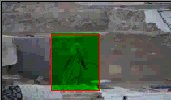 Green |
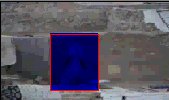 Blue |
 Darken |
 Brighten |
 Xor |
 Posterize |
 Blur |
 Grey |
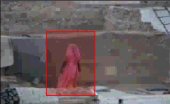 Slight red |
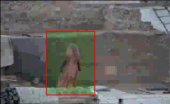 Slight green |
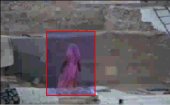 Slight blue |
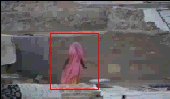
The three slight filters have less contrast than the raw red, green and blue filters. Indeed, the fact that you want something in the video become interactive doesn't mean that a very perturbing and highly contrasted visual effect should be associated. These slight filters are here to let you add interaction, while preserving the mood of the video itself.
Now for something important and expected. Naturally, when you ask the program to play the video, it starts playing it and you can see the frame slider go incrementally towards the right. Nothing can stop it except the end of the video itself, in which case the video is rewinded. But anyway, if the user sets a begin mark and an end mark, why those marks shouldn't define an interval of time or frames (depending on how you see it) such that whenever the current frame is more to the right than the end mark, then the video is rewinded towards the begin mark, then continues to play. This concept is easy, and productive. Its aim is to let you concentrate on the interesting part of the video, the actor or object, and not the whole video which may have hundreds or thousands of actors, moving objects, informations, and so on.
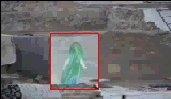
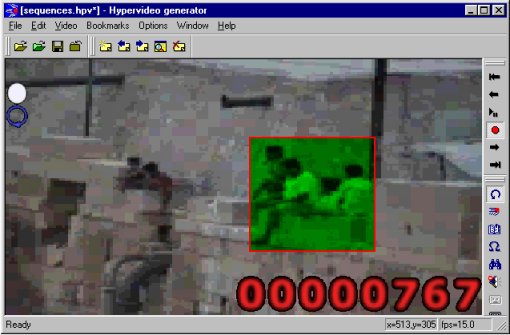
We call it LOOP MODE. Then, how it works ? When you launch the program, this setting is not activated. To activate it, go to the Video menu, then select ENABLE LOOPS, or press the ESC key, or press the LOOP icon in the options toolbar. To deactivate it, go to the Video menu, then select DISABLE LOOP MODE, or press the ESC key, or press again the LOOP icon in the options toolbar. The loop mode is a global setting, it is not attached to a particular sequence. When the loop mode is ON, you can see a blue loop symbol overlayed on the video on the top-left corner, below the places the record mode would display a red/white circle.
Blue loop symbol overlayed on the video in LOOP MODE (the loop icon is also
checked)
Whenever the current frame is inferior to the begin mark, or greater than the end mark, the video is rewinded to the begin mark of the current sequence, then the video continues playing. This facility lets you control whether a sequence is well captured or not. You can of course still use all other controls as you would do in non-Loop mode.
When the loop mode makes the video rewind, the record mode is automatically cut down. It's natural and intuitive. The record shouldn't continue. It shouldn't, but it's also useless if you consider the requirements for a keyframe to be stored in memory. So the program does it for you.
A lot of stuff in this program is manual, in that it can be activated or activated, while switching is mostly done using the same key or menu function. While it's our opinion that the user should have maximum freedom in what he does, ie the controls should be almost always available, and rarely modal, it's also our opinion that the user should be "assisted" by the program, which has all data and informations to know that in some cases there are things and operations which are useless.
Besides, we wanted the record process be automatically launched when the user thinks in its mind it be launched.
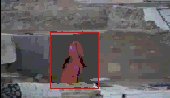
It works like this : imagine there is neither red nor white circle on the video. Then use your mouse and translate or stretch the hotspot. Guess what ? At the moment you start doing so, the record is launched. For the record process to be launched, the current frame must be of course inside the begin-end marks interval, but that should be obvious. Then follow the record process. The record mode will be automatically deactivated when it reaches the end mark, if you are in loop mode, see earlier paragraph.
All in all, the record process is automatical and transparent to the user. With little attention and training, the user has in his hands a powerful record engine which is fast, accurate and somewhat intelligent.
Live record in Loop mode
A video comes with a lot of information at any frame. In a video of one hour, with a rate of 25 frames by second, there may have up to 80000 of those plentyful frames. There must be a tool to index the places where the information is relevant according to the user. Setting a begin and an end mark corresponds to a focus to a segment of the video : for the actor behind this, the rest of the video is not relevant, at least at the moment. But the marks are associated to the current sequence.
So let us introduce global marks. By analogy with Internet Browser page bookmarks, we let the user press the F2 key, or go to the Bookmark menu, and select ADD BOOKMARK, or even press the BOOKMARK icon in the options toolbar, whenever the frame is important to him. The bookmark menu is a dynamical menu which appends all new bookmarks. A bookmark is appended whether the video is playing or paused. It just doesn't matter. From now on, the user can select new dynamical functions, named "Bookmark #x", to perform a seek in the video.
When the current frame corresponds to one of the bookmarks you have created, the bookmark menu has a check-box in front of it. This prevents you from begin puzzled with multiple bookmarks on one hand, and all informations that a video contains in itself on the other hand.
The last bookmark in the menu can be removed. Just press SHIFT-F2.
The limitations ? Well, you can't add more than 10 bookmarks. The bookmarks are not saved within the HPV file. We hope you don't mind and consider that the bookmark concept is quite relevant.
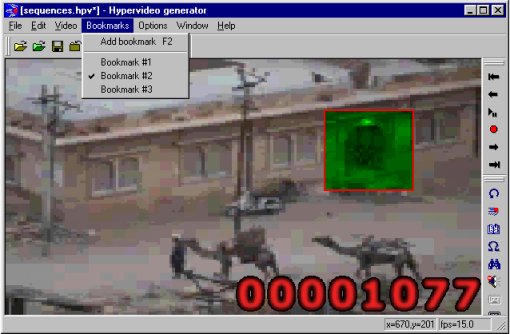
The bookmark menu after three new adds
Now you can switch to fullscreen using the standard key ALT + ENTER, and return to window mode using the same key combination. It is meant essentially to playback aesthetism, since a video taken from a real movie, and being played fullscreen - that is without any windows - is much nicer to watch, than in window mode. At least, that's what we think. Remember, as we have mentioned, there is no window hence there is no toolbar too. While most functionalities can still be accessed using the keyboard, you won't see any menu nor dialog box, nor toolbar. We believe the fullscreen mode is mostly a preview mode when a sequence is finished. But anyway, you can record a sequence in fullscreen mode since the mouse and the SPACE BAR are still available. As the timecode and other flags such like mark-in, mark-out, record mode, and loop mode are overlayed on the video, they are still available in fullscreen mode.
HyperGen provides more than simply switching to fullscreen. It enumerates all display modes supported by your video card, and builds dynamically a menu out of that. In the window menu, when a video is loaded, you can access such menu, with all modes available. For example, switching in 640*480*16 is a standard fullscreen mode used by a lot of authoring tools at run-time. Thus, you can preview what your hypervideo looks like with this functionality.
Just notice that palettized modes, ie 8-bit modes, are not handled, because it is by far relevant to true old technologies.
Here is a screen capture of the modes available on a standard machine.
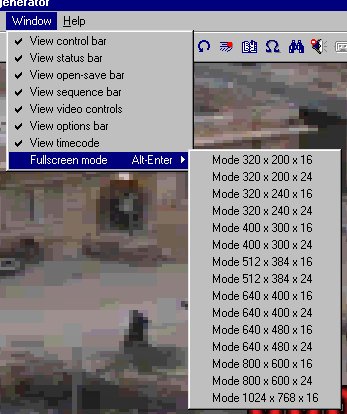
Example of enumeration of fullscreen display modes
You can reduce dramatically the number of keyframes in any of the sequence. A mathematical algorithm, watches a given sequence, follows all the hotspots from the start up to the end and removes any unnecessary keyframe. When you are in record mode, the program saves in memory as much frame positions as it can, to allow precise replay of what you did with your mouse. Those frame positions are actually keyframes. That is, if the CPU is not fast enough so the video engine drops one or more frames to stay synchronized with the audio channel, and actually doesn't show them, there will be missing positions in the sequence, but the interpolator engine evaluates such frames between two keyframes, so everything is ok. This is the main concept, and it is at the basis of HyperGen. But in the mean time, in record mode with the videoplaying, the program saves keyframes even when the hotspot doesn't move, or moves slightly only, or moves along a line, or a path which can be described with only a couple of keyframes. In that case, the optimization is not only good, it's also amazing. Try it. Load an old HPV file, and optimize all sequences (there is a function for that in the options menu). The program will optimize the data, then show statistically what is the gain. You should see something exceeding 70%. During our tests, most of the time, the gain was 90%, 95% or even 97%. The HPV file length has dropped down to sequences with just a couple of keyframes. You understand. Amazing. Of course, this engine works all alone. No parameters. Everything is done automatically.
What is even more amazing, is that the optimization engine is even well fitted to such a video tool, since an actor in a video is often either static, or in rotation but globally static, or in translation due to own displacement, or camera motion. Very often, motions are roughly linear (static is a specific case of linear), and it would have been silly not to care about that. The optimization process is instantaneous. The CPU charge is in fact so little that we could have implemented the optimization engine inside the manual tracking engine, and do the stuff when the user generates a sequence. The user wouldn't have noticed anything, but anyway...
After optimization, a lot of non trivial sequences are often made down to a couple of keyframes only. In fact, one may understand that if only a real keyframe tool was available, he would generate manually a sequence with those keyframes placed at the right position at the right time, according to him, and no other keyframe. But likewise, the optimization engine keeps all keyframes corresponding to motion gradients, hence corresponding to intuitive and natural good keyframes for the sequence. In other words, the optimization engine can be regarded much like an intelligent automatical keyframer. The freedom of manual tracking plus this intelligent engine is the basis of this highly production-oriented program. As it is easy to imagine other video related tools using mathematics and even physics/mechanics, we believe the future is open and bright...For example, if the optimization engine took care of the real content of the video in the same time, it wouldn't be called an optimization engine, but an automatic object tracking engine.
The table below lists use cases (amount of keyframes before and after optimization) :
| Type of motion |
Before optimization
|
After optimization
|
Gain
|
| Static hotspot |
87
|
2
|
97.7%
|
| Static hotspot (longer) |
294
|
2
|
99.3%
|
| A-to-B motion |
50
|
10
|
80%
|
| A-to-B-to-A motion |
75
|
16
|
79%
|
| A-to-B-to-C motion |
71
|
17
|
76%
|
| Circle motion |
130
|
25
|
81%
|
| Non regular motion |
120
|
24
|
80%
|
| Chaotic motion |
69
|
61
|
12%
|
| Static hotspot with slight stretch |
75
|
2
|
97%
|
| Static hotspot with A-to-B stretch |
40
|
6
|
85%
|
| Static hotspot with non regular stretch |
87
|
8
|
91%
|
| Non regular motion with non regular stretch |
77
|
30
|
61%
|
|
Avg : 78%
|
The effect of the optimization engine - is it useful or not ?
And now a real test case for an HPV file consisting in 4 sequences :
| 4 misc. sequences |
513
|
153
|
70%
|
Analysis of the results :
To activate the optimizer, open the Options menu and select OPTIMIZE CURRENT SEQUENCE, or OPTIMIZE ALL SEQUENCES, or click the optimize icon in the Options toolbar to optimize the current sequence.
You can cut the sound if you want. While it seems useless, in fact it's not. When there is sound and video, in fact DirectShow uses a reference clock to synchronize the two streams. It means that the sound will always fit the current frame of the video. What is a real great feature is also a drawback : to allow synchronization, the video engine sometimes drops video frames. When you play the video, and watch the timecode, you may understand that it is not incrementing one by one. And if you think so, you are right. But no bad guessing, video positioning remains fully accurate : when you perform a seek with the slider or something else, it falls where it should fall. To force the video engine to decode and display EACH frame of the video, the clock must be thrown away. And to us this also means to throw the sound, since unsynchronized sound is lousy. HyperGen hence allows you to do so.
To cut the sound, open the options menu and select DISABLE SOUND. To put the sound again, open the options menu and select ENABLE SOUND. You may do it clicking in the sound icon in the Options toolbar.
We didn't stress much about the timecode. By default, the program displays on the downer-right corner of the video window, a timecode, which is a more aesthetic copy of the current frame displayed in the control bar. Some people like big timecode. The timecode is not really useful at the moment, but it comes in FULLSCREEN mode. In this case indeed, there is no window, nor control bars anymore.
You can hide the timecode, if an actor is behind for example, by going to the Window menu, then uncheck VIEW TIMECODE.
You can see all properties of the current video, including fully qualified name, dimensions, frame rate, duration, and the filter graph built by the video engine, in terms of DirectShow filters. The filter graph is described from the source filter to the ending render filter, and the audio engine comes after the video engine. Since codecs are important in order to know whether a given video file format can be played on screen, through HyperGen or any other DirectShow-based program, we have also implemented a procedure which lists all multimedia codecs available on the machine of the user. These codecs include of course all video codecs, but also audio codecs, and other or hybrid codecs.
A video file is a compressed file. To play it, DirectShow needs a "codec". DirectShow wraps a lot of VXD codecs as if they were natively DirectShow codecs : on one hand it is an illusion, but on the other hand it is great since DirectShow may read and play a non standard video file format, just if you install properly the codec given by the manufacturer. When you install Windows95, you have by default all AVI, MOV (non proprietary QuickTime) and MPEG-1 codecs. Thus, you can read such formats. When you install the Windows Media Player, it also installs the ASF codec, which in itself is aimed at interactive streaming video. But more important, the video doesn't even need to be on your local disk, it can be over the network, because DirectShow automatically uses a specific networked data reader.
Here is an example of video properties :
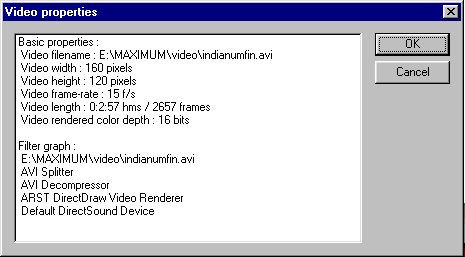
An example extolling all video properties retrieved
And here is an example of DirectShow filter enumeration :
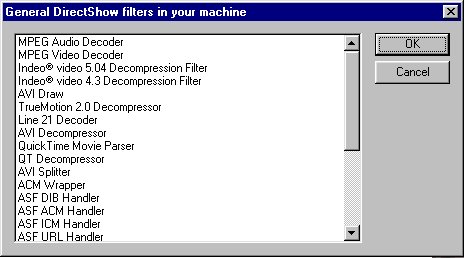
General DirectShow media filters
Of course, it's a good idea to load an HPV file later, and continue to work. Imagine you have a video with over 500 actors to track. Hugh !!! Well, the function is implemented and works like this : as the associated video file is saved in the file too, the program tries to open the video and start rendering it on screen. If the video can't be opened automatically, the program shows a file dialog box and let you tell where is really the video. The program then tries to read all sequences, with all other subsequent keyframes, and creates the corresponding sequence containers in memory. When all the file is read, it finishes by selecting the last sequence read, and it calculates the begin and end marks for each sequence. By default, all the sequences have their "interpolate in-between frames" flag unchecked, meaning that a consecutive save will not use the interpolation engine.